Junesix Metallic Ink Pad (Individual Pads)
- SKU:
- WS01
- Weight:
- 0.01 KGS
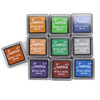
Metallic Dazzle Ink Pad for Wax Seal Highlighting
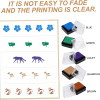
Junesix cloth ink pads. These water-based pigments are specifically formulated for absorbable surfaces like paper, cloth, and wood (unpainted), delivering vibrant colors without smudging.
WHAT'S INCLUDED? 1x Junesix Branded ink pad (Mettalic Dazzle)
Precautions:
- Fabric Selection: Opt for fabrics with fine fibers and good absorption such as cotton, linen, and fine canvas for optimal results. Thick, loose, or uneven fiber fabrics may yield poor stamping effects.
- Preparation: Ensure the cloth surface is dry by washing and drying it before stamping. After stamping, allow the ink pad to dry completely, then fix the color by ironing for 30 seconds at approximately 160°C. While our ink is machine washable, note that washing resistance may vary across different fabric types, with colors potentially lightening after washing off the floating color.
- Stamping Technique: Achieve uniform pattern coloring by applying moderate and consistent pressure when stamping on cloth. Practice on scrap fabric beforehand to master the technique.
- Wood Application: When using on wood (without paint), ensure it is fully dried with a hair dryer before stamping.
- Embossing: Our ink pad is compatible with embossing powder for added customization.
How to Use:
- Small Stamp: Tap the small stamp directly onto the sponge of the printing pad until the ink pad is covered with the pattern.
- Large Stamp: Place the printing surface upwards on a table, hold the printing pad with your hand, and gently tap the sponge downward onto the printing surface until the ink pad is covered with the pattern.
Using Our Highlighting Inks:
- Preparation: Melt your wax and have it ready for embossing with your seal.
- Ink Application: Dab or brush your dry seal onto the ink pad using even pressure. Smooth the ink onto your seal by gently brushing across the surface of the ink pad to remove any excess ink.
- Sealing Process: Press your seal evenly and gently into the wax. Allow the wax to set momentarily before lifting the seal straight up to release.
- Cleanup: Once finished, clean your sealing coin face with a damp cloth.
- Adjustment: Experiment with the amount of ink used to achieve your desired look. If coverage is not sufficient, use a cotton swab to move the ink around as it dries on your seal.
Note: Excess ink may not dry immediately on wax surfaces and could take 24+ hours to completely dry. However, this usually does not pose an issue unless being directly held and touched, as the ink is applied to the recessed area of the wax seal face.


